In today’s digital age, optimizing your WordPress website for increased revenue isn’t just about content—it’s about experience and increased engagement. One effective way to do this is to add download timers directly to your posts. Not only does this benefit your audience, it also encourages action, which can significantly increase your revenue.
Why would you use a download timeout?
Download timers serve several purposes. That creates a sense of urgency and encourages users to act quickly, potentially increasing the chances of a landing. Furthermore, providing clear instructions on when to start downloading enhances the user experience, thus reducing confusion and improving satisfaction.
Step-by-step instructions on how to use download timers
Step 1: Preparation
Before you begin, make sure you have access to your WordPress theme files. You will be directly integrating custom HTML, CSS, and JavaScript, so familiarity with these languages is beneficial.
Step 2: Styling with CSS
Next, style your timer and make sure it blends in well with the layout of your site. Customization here can enhance visual appeal and reinforce your brand identity.
<style>
body
#downloadButton {
padding: 15px 30px;
font-size: 16px;
border: none;
border-radius: 5px;
background-color: #E82F0E;
color: white;
cursor: pointer;
transition: background-color 0.3s;
}
#downloadButton:hover {
background-color: #000000;
}
#timerText {
margin-top: 20px;
font-size: 16px;
}
</style>
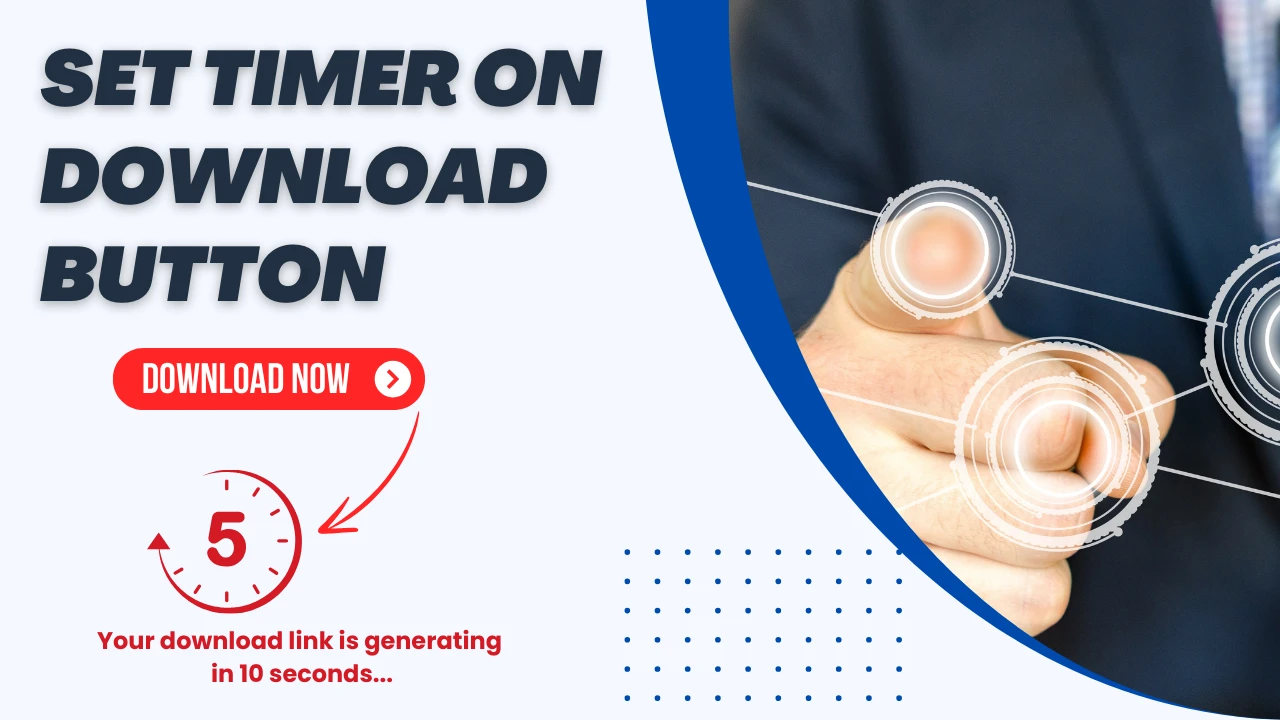
<center> <button id="downloadButton" onclick="startDownload()">Download Elementor Now</button>
<p id="timerText" style="display: none;"><big> Your download link is generating in <span id="countdown">10</span> seconds...</big></p></center>
Step 3: Use JavaScript (JS).
the countdown function is required for your scheduler. This javascript code will handle the countdown and activate the download link when the countdown reaches zero.
<script>
    function startDownload() {
        // Hide the button
        document.getElementById('downloadButton').style.display = 'none';

        // Show the timer text
        let timerText = document.getElementById('timerText');
        timerText.style.display = 'block';

        // Start the countdown
        let countdown = 10;
        let interval = setInterval(function() {
            countdown--;
            document.getElementById('countdown').textContent = countdown;

            if (countdown <= 0) {
                clearInterval(interval);
                timerText.textContent = 'Your download is starting...';

                // Start the download (replace with your file URL)
                window.location.href = 'https://www.rofitech.net/';

                // Optionally, hide the timer text after download starts
                // timerText.style.display = 'none';
            }
        }, 1000);
    }
</script>
Step 4: Integrate with WordPress
Once you have your HTML, CSS, and JS, add them to your WordPress post:
Change the post where the download link is.
Switch to HTML editing mode.
Paste your HTML layout (from Step 2) where you want it.
Save or update your information.
Step 5: Test and optimize
Carefully test the download time to ensure that it works as expected on different devices and browsers. Monitor user interaction and adjust duration or schedule based on feedback to optimize conversion rates.